Synchronising calendars and address books on MacOS
How to synchronise your calendar using MacOS Calendar
-
Open your web browser and sign in on wölkli's web interface (wölkli PRO | wölkli FREE) using the provided form.
-
Select the Calendar icon from the list on the top left of your web browser.
-
Click on the gear icon at the bottom left of your screen to open the settings.
-
Copy the link under iOS/OS X CalDAV address, as highlighted in the following screenshot:
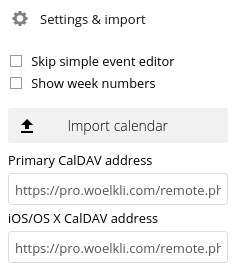 The full address will look something like this: 'https://pro.woelkli.com/remote.php/dav/principals/users/username/' ('https://cloud.woelkli.com/remote.php/dav/principals/users/username/' for wölkli FREE users), where username is the e-mail address that you use to log in on wölkli.
To create a new calendar:
-
In MacOS, open System Preferences.
-
If you are using Mac OS X 10.9 or a later version, select Internet Accounts. For previous versions of Mac OS X, select Mail, Contacts & Calendar.
-
Select Add Other Account....
-
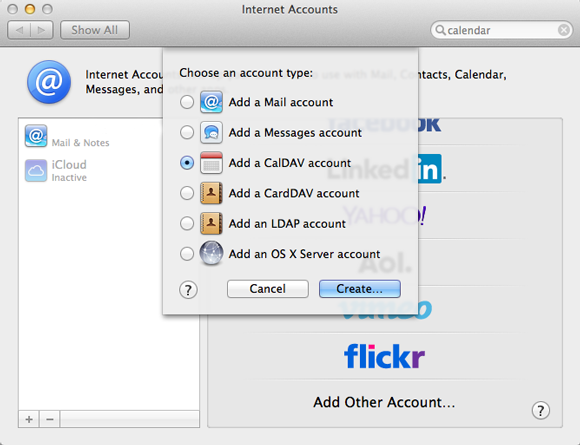
Choose Add a CalDAV Account. In Mac OS X 10.9 or later versions, select the option Manual.
-
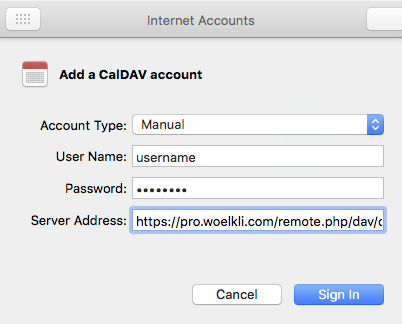
Give your user name and password.
-
In the Server Address field, paste the link that you previously copied from wölkli's web interface (refer to steps 1 through 4 of this guide).
-
Your calendar is now set up and in sync!
How to synchronise your address book using MacOS Contacts
-
Open your web browser and sign in on wölkli's web interface (wölkli PRO | wölkli FREE) using the provided form.
-
Select the Contacts icon from the list found on the top left of your web browser.
-
Click on the gear icon at the bottom left of your screen to open the settings.

-
Click on the chain icon next to the address book that you wish to synchronise. In the field that appears, select and copy the address, as shown in the following screenshot:
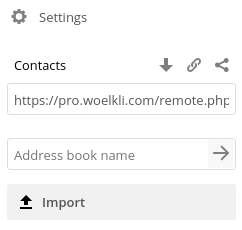 The address looks something like this: 'https://pro.woelkli.com/remote.php/dav/addressbooks/users/username/addressbook_name' ('https://cloud.woelkli.com/remote.php/dav/addressbooks/users/username/addressbook_name' for wölkli FREE users), where username is the e-mail address that you use to log in on wölkli's web interface, but with %40 instead of the @ symbol and addressbook_name is the name of your address book.
To create a new address book:
-
In MacOS, open System Preferences.
-
If you are using Mac OS X 10.9 or a later version, select Internet Accounts. For previous versions of Mac OS X, select Mail, Contacts & Calendar.
-
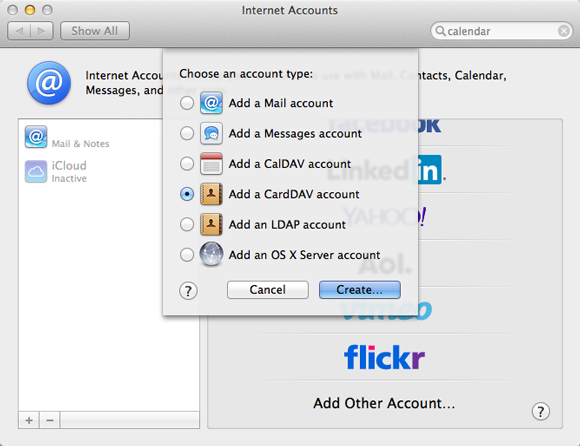
Select Add Other Account... from the bottom of the list.
-
Choose Add a CardDAV Account.
-
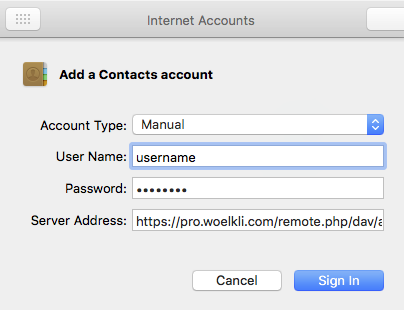
Enter your user name and password.
-
In the Server Address field, paste the link that you previously copied from wölkli's web interface (refer to steps 1 through 4 of this guide).
-
Your address book is now set up and in sync!
