Synchronising calendars and address books in MS Outlook
How to synchronise your calendar using MS Outlook and Outlook CalDav Synchronizer
-
Download and install Outlook CalDav Synchronizer according to the website's instructions. This will create an additional tab in MS Outlook, as shown in the following screenshot:

-
Open Outlook CalDav Synchronizer and press the plus button on the top left of the window, in order to add a new calendar profile. In the dialogue that appears, select Nextcloud.
-
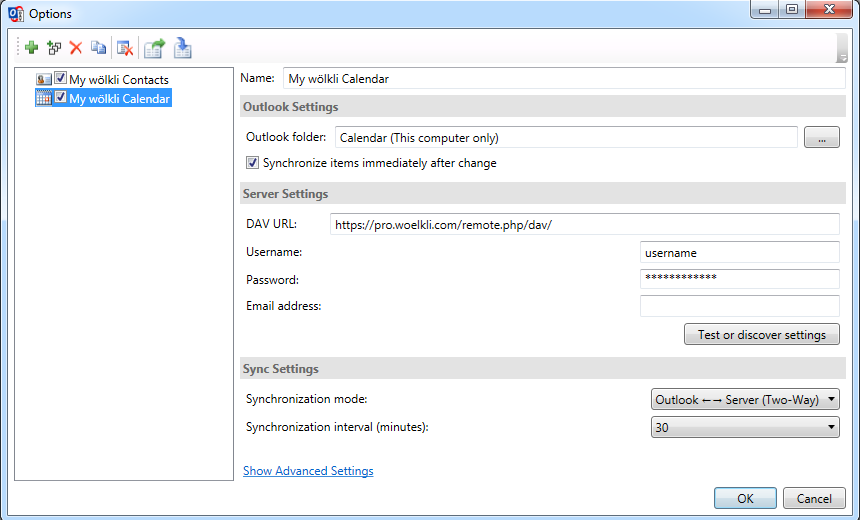
Give a name to the new profile, e.g. 'My wölkli Calendar', and choose a MS Outlook folder to synchronise; this folder corresponds to your MS Outlook calendar.
-
Under Server Settings, enter the DAV URL: https://pro.woelkli.com/remote.php/dav/.
Note: If you are a wölkli FREE user, you will need to use the following as DAV URL: https://cloud.woelkli.com/remote.php/dav/.
-
Next, enter your username and password and click on Test or discover settings. If you have more than one calendars, these will appear in a dialogue and you will be able to choose which one(s) to synchronise.
-
You can adapt the rest of the settings to your personal preference or simply leave them to their default state.
-
Finally, click OK to save the new profile and establish the connection to the server.
How to synchronise your address book using MS Outlook and Outlook CalDav Synchronizer
-
Download and install Outlook CalDav Synchronizer according to the website's instructions. This will create an additional tab in MS Outlook, as shown in the following screenshot:
-
Open Outlook CalDav Synchronizer and press the plus button on the top left of the window, in order to add a new address book profile. In the dialogue that appears, select Nextcloud.
-
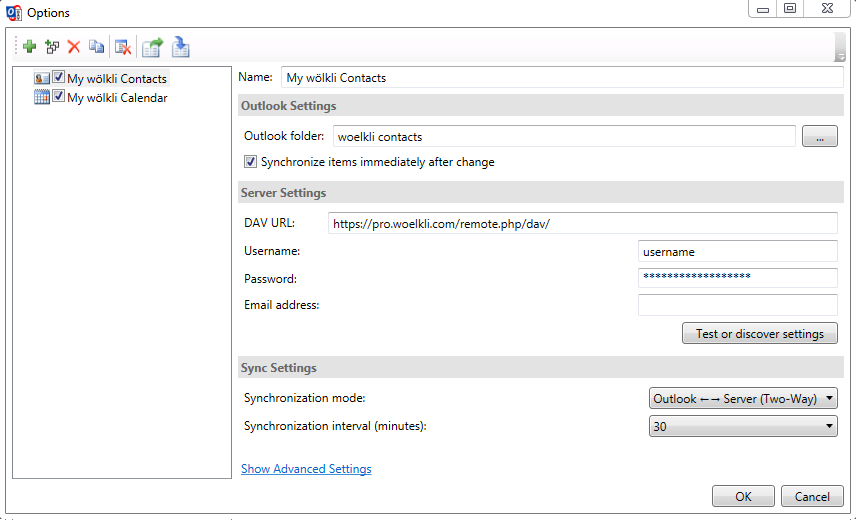
Give a name to the new profile, e.g. 'My wölkli Contacts', and choose a MS Outlook folder to synchronise; this folder corresponds to your MS Outlook contacts.
-
Under Server Settings, enter the DAV URL: https://pro.woelkli.com/remote.php/dav/.
Note: If you are a wölkli FREE user, you will need to use the following as DAV URL: https://cloud.woelkli.com/remote.php/dav/.
-
Next, enter your username and password and click on Test or discover settings. If you have more than one address books, these will appear in a dialogue and you will be able to choose which one(s) to synchronise.
-
You can adapt the rest of the settings to your personal preference or simply leave them to their default state.
-
Finally, click OK to save the new profile and establish the connection to the server.
