Establish a WebDAV connection
-
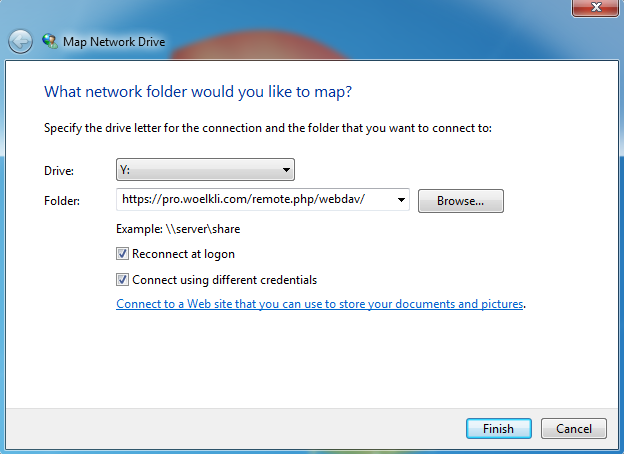
Open Windows File Explorer and click on This PC (or My Computer in older versions of Windows) on the side menu. In File Explorer's top-bar menu, select Map network drive.
-
In the window that opens, select the drive letter of your choice under Drive. In the field Folder specify the WebDAV URL: https://pro.woelkli.com/remote.php/webdav/. Make sure you also check the option Connect using different credentials.
Note: If you are a wölkli FREE user, then you will need to use the following as the WebDAV URL: https://cloud.woelkli.com/remote.php/webdav/.
-
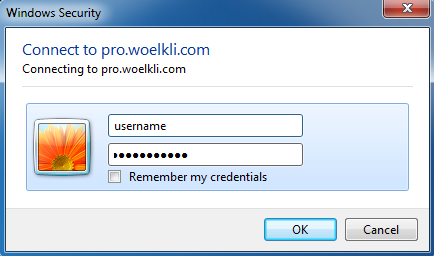
When prompted, provide your wölkli user name and password. The WebDAV connection will be established.
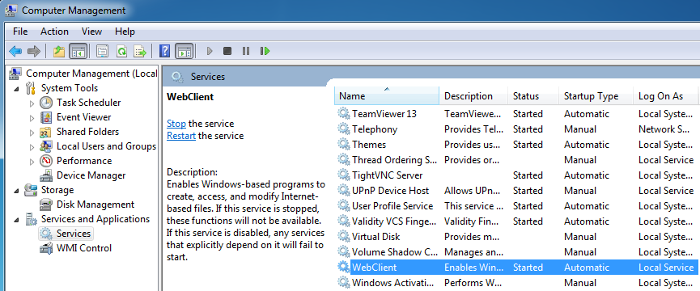
Enable the WebClient service
Note: This is an optional step, in case the WebDAV connection cannot be established or if connection attempts randomly fail. In these cases, the start mode and the status of the WebClient service may need to be changed, as explained below:
-
Click on Start and search for Computer Management.
-
Once inside, navigate to Services and Applications > Services > WebClient.
-
Double-click on WebClient and set the Startup type to automatic. Start the WebClient service, if it is not running. Apply the changes, then click OK to save and exit.

-
You can now try again to establish the WebDAV connection, as described in the guide above.
